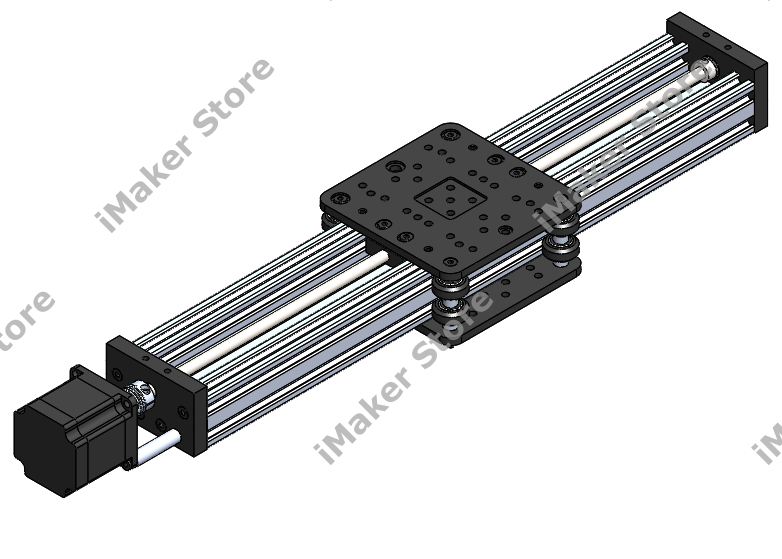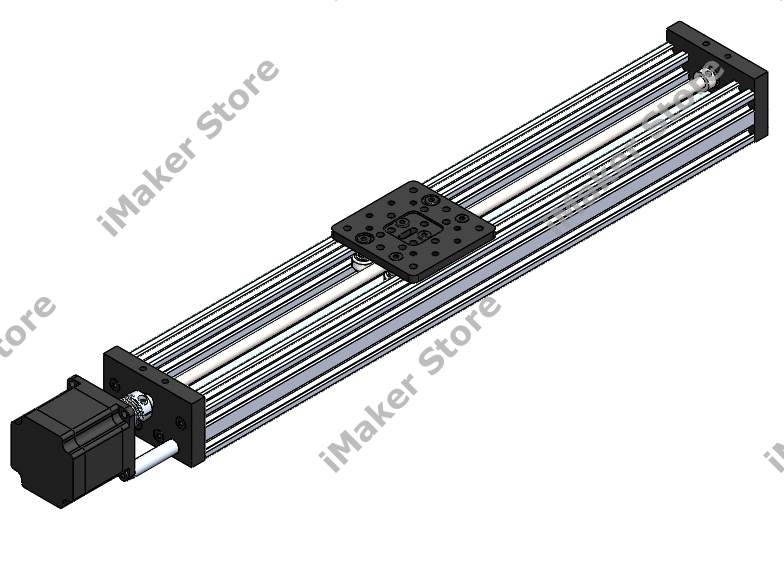
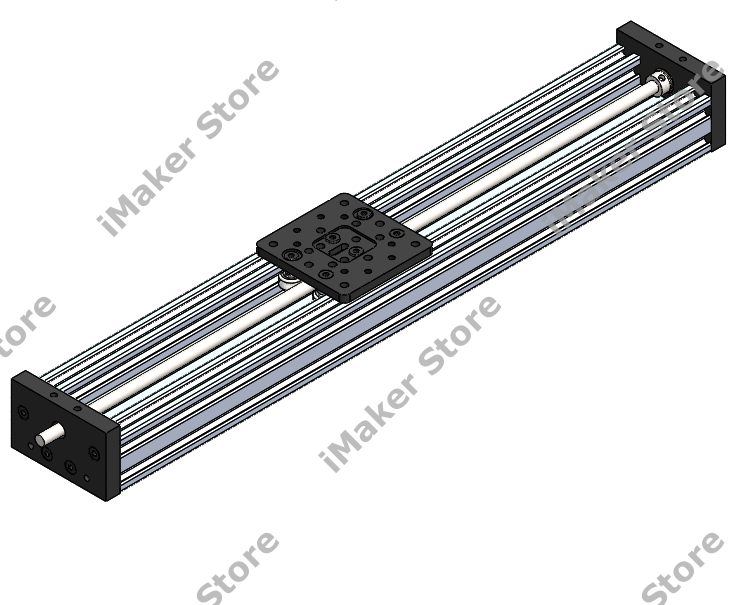
C-beam Actuator Kits
- C-Beam Actuator Kit
- C-Beam Actuator Kit -Double Wide Gantry
- C-Beam Actuator Kit-XL Gantry
- C-Beam Actuator Kit-Double plate XL Gantry
About the C-Beam Actuator Kit:
The C-Beam Actuator Kit is an efficient actuator that can easily be incorporated into any project due to its straightforward design. It comes in different sizes, with the only difference being the length of the Lead Screw and Extrusion - making it easy to customize to your project. With its straightforward design, you'll have no trouble incorporating it into your project with ease.
Our assembly manual makes it easy to put together the C-Beam, C-Beam XL, and C-Beam Double-Wide, with step-by-step instructions for plate assembly and actuator assembly. Don't worry, the process is the same for all C-Beam sizes, except for the Gantry plates. Let's get building!
The Kit Includes:
| Product No | Product Name | Qty |
| 1 | C-Beam Gantry Cart Bundle/ C-Beam Double Wide Gantry Bundle/ C-Beam Gantry XL Bundle | 1 |
| 2 | C-Beam End Mount Plate | 2 |
| 3 | 688ZZ Ball Bearing (BE-688ZZ) | 2 |
| 4 | Flexible Coupling-D20L25 6.35x8mm | 1 |
| 5 | Precision Shim T1x8.1x12mm | 2 |
| 6 | Shaft Lock Collar | 2 |
| 7 | M5 Low Profile Screws-20mm | 8 |
| 8 | M5 Low Profile Screws-55mm | 2 |
| 9 | Metric Aluminum Spacers – 40mm | 2 |
| 10 | Anti-Backlash Nut Block Gantry Hardware Pack | 1 |
| 11 | C-Beam 4080 -250/500/1000/1500mm | 1 |
| 12 | ACME/Metric 8mm Lead Screw TR8*8-For Cbeam length | 1 |
Note: 1000mm and 1500mm also include hardware for tensioning the lead screw.
Open Package and Check All Components:
It's important to get organized before beginning any build. Unpack all parts of your kit and verify each piece against the Bill of Materials. If any pieces are missing, contact us right away.
Tools Required
- Allen keys set
- 8mm spanner/wrench
Important Pre-Assembly Notes
Before starting your build, we suggest taking a minute to read through the assembly guide so you can get an idea of how everything fits together. Pay close attention to each step and make sure you understand the instructions before continuing. Also, be mindful when attaching parts - if it feels like you're having to put a lot of force into it, stop, re-read the instructions, and try again. Don't over-tighten screws - doing so may strip the thread or head. If you have any questions about the build, don't hesitate to reach out to us. You can chat with us live on the store website or email us at contactus@imakerstore.com - we're here to help!
We value your time, that's why we ship our products with pre-assembled subassemblies like wheel kits and gantry carts to make your build process faster and simpler. Need help with our products? Don't hesitate to reach out - our team is ready to answer your questions. You can contact us via our live chat or email us at contactus@imakerstore.com. We look forward to hearing from you!
Follow Step by Step Assembly Instructions:
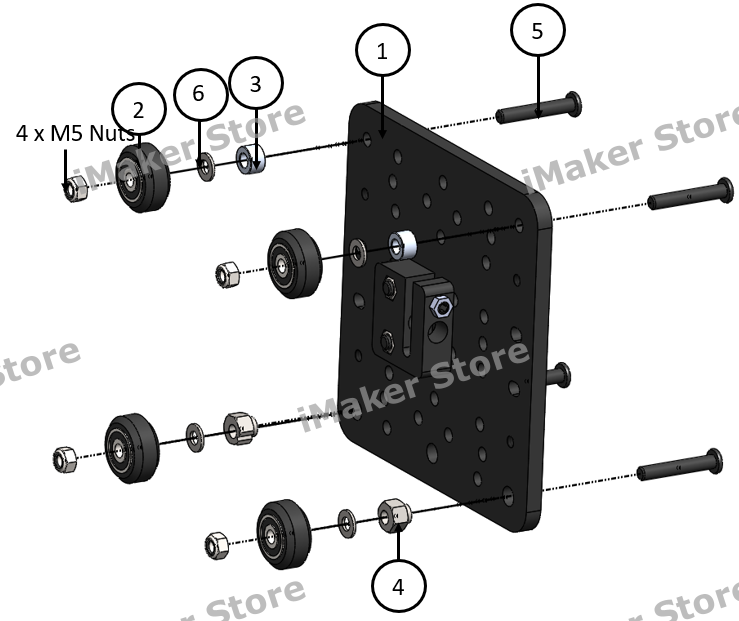
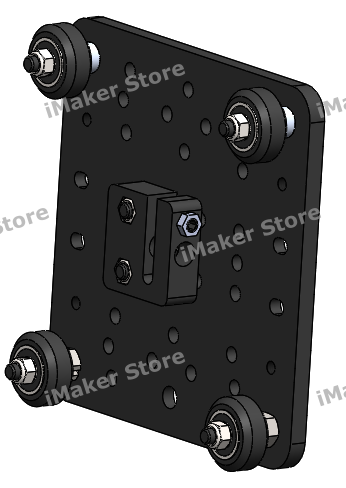
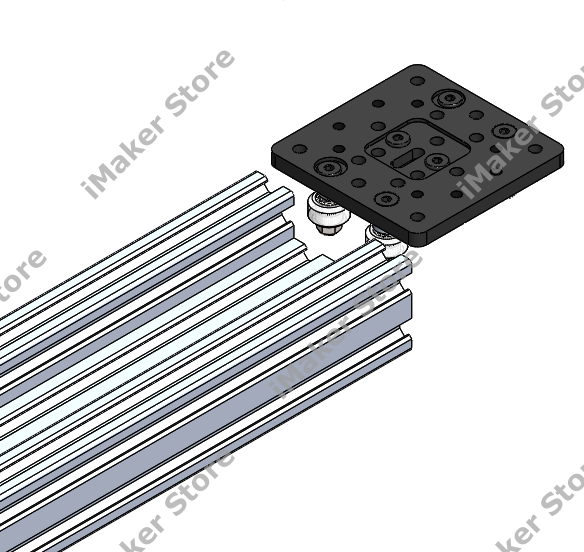
Step1: Assembly of Anti-backlash nut block to the gantry plate
Below you can find the instructions for assembling either a simple nut block or an anti-backlash nut block, which are commonly used in gantry carts for leadscrew-driven actuators. To ensure that backlash is prevented, make sure the setscrew (1b) is securely tightened. Additionally, make sure to avoid over-tightening the M5 screws on the gantry plate. It's important to leave them slightly loose in order to maintain flexibility, which ultimately allows the leadscrew to adjust and ensure smooth motion. The following images depict the assembly of the anti-backlash nut block and simple nut block to the gantry plate.
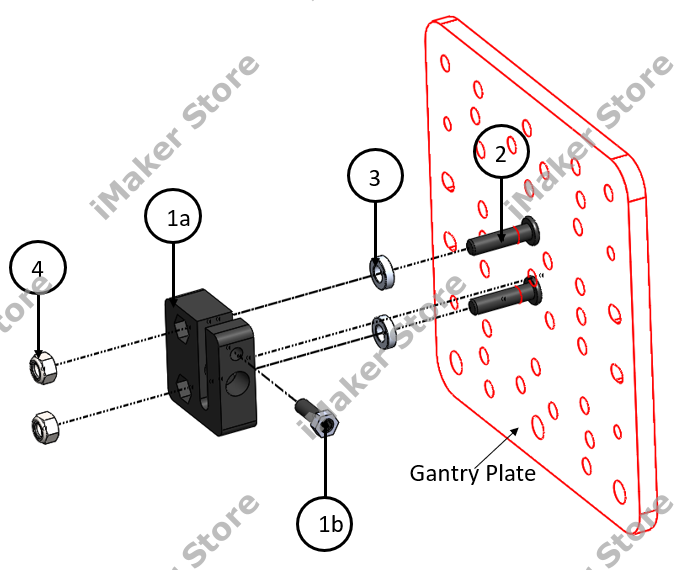
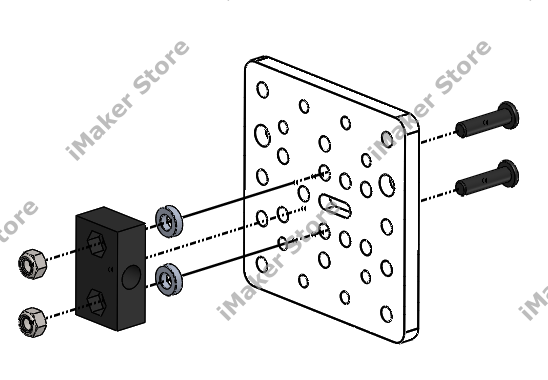
Assembly of anti-backlash nut block Assembly of simple nut block
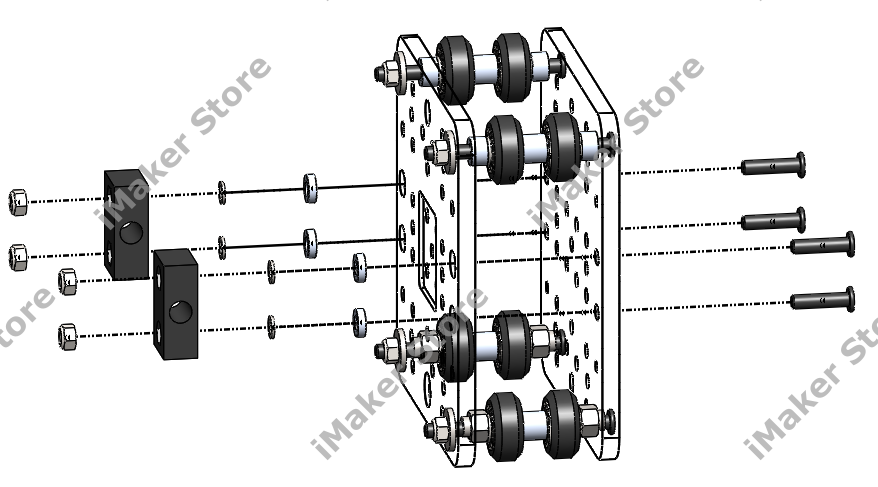
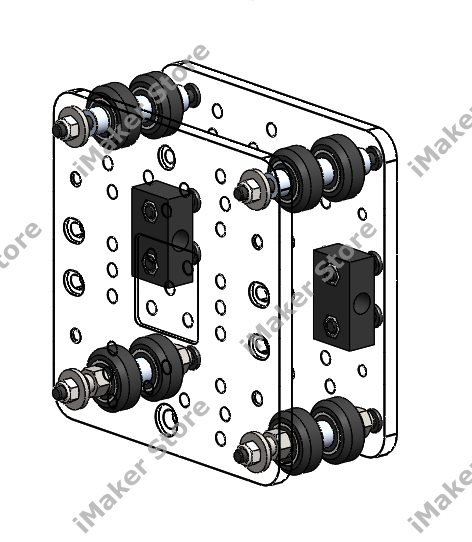
Step 2: Gantry cart assembly
In C-beam actuators, gantry cart
2A: Assembly of C-Beam Gantry Cart Bundle for C-Beam Actuator Kit, follow assembly instructions here
2B: Assembly of C-Beam Double Wide Gantry Cart Bundle for C-Beam Actuator Kit -Double Wide Gantry, follow assembly instructions here
2C: Assembly of C-Beam XL Gantry Cart Bundle for C-Beam Actuator Kit-XL Gantry, follow assembly instructions here
2D: Assembly of C-Beam XL Gantry Cart Double plate Bundle for C-Beam Actuator Kit-XL Gantry, follow assembly instructions here. This gantry cart bundle is not listed in the store, but the parts are available. Feel free to reach out to us if you need one.
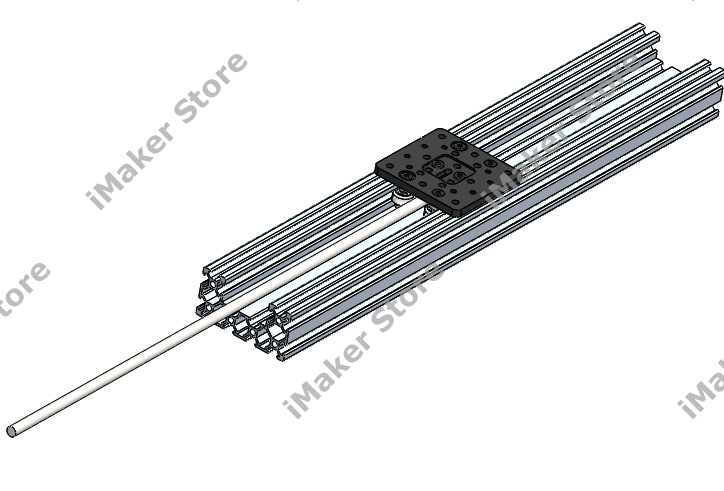
Step 3: Attaching gantry cart to C-beam
Note: Make sure that the C-beam's ends have M5 threading for attaching the end plates in the later stages of assembly. If you did not order the kit with M5 tapping, you may not find threading at the C-beam ends. In such a scenario, it is necessary to manually thread it using M5 taps. Ensure that the threading is at least 15mm deep to simplify the process.
Note: Make sure the gantry cart runs smoothly along the V-slot rail by adjusting the eccentric spacers.
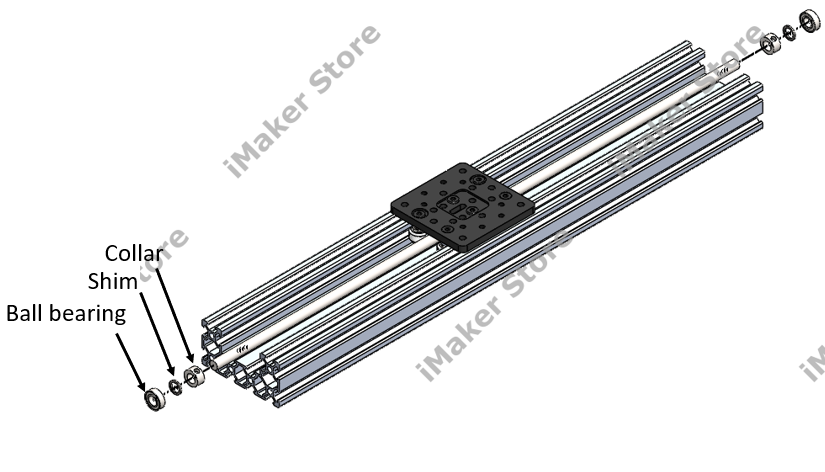
Step 4: Leadscrew Assembly
- First, insert leadscrew through the nut block as shown in the image
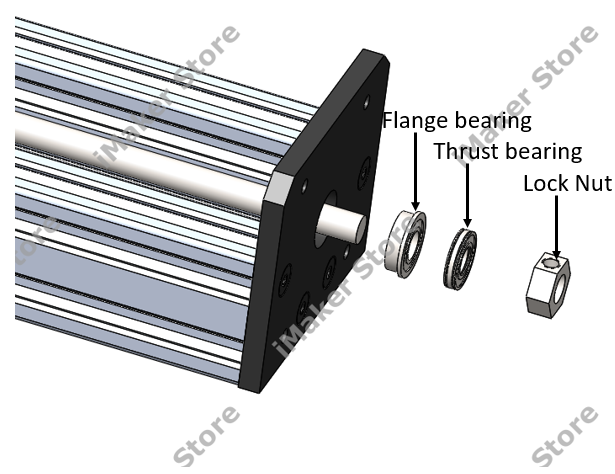
- Then, insert the collar, shim, and ball bearing at both ends of the leadscrew as shown in the image.
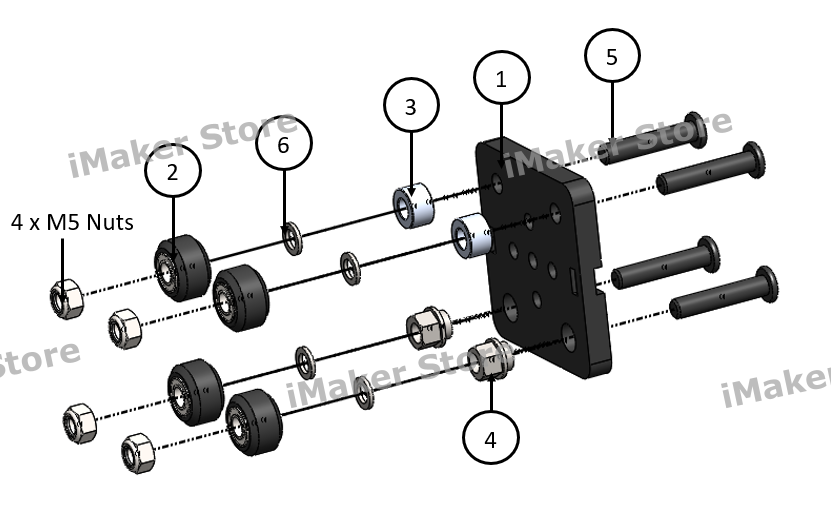
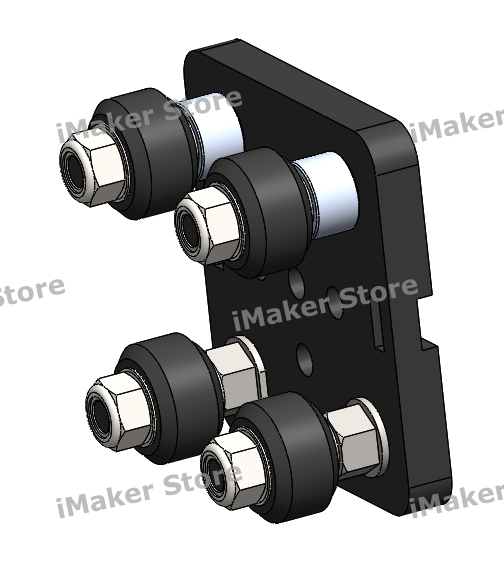
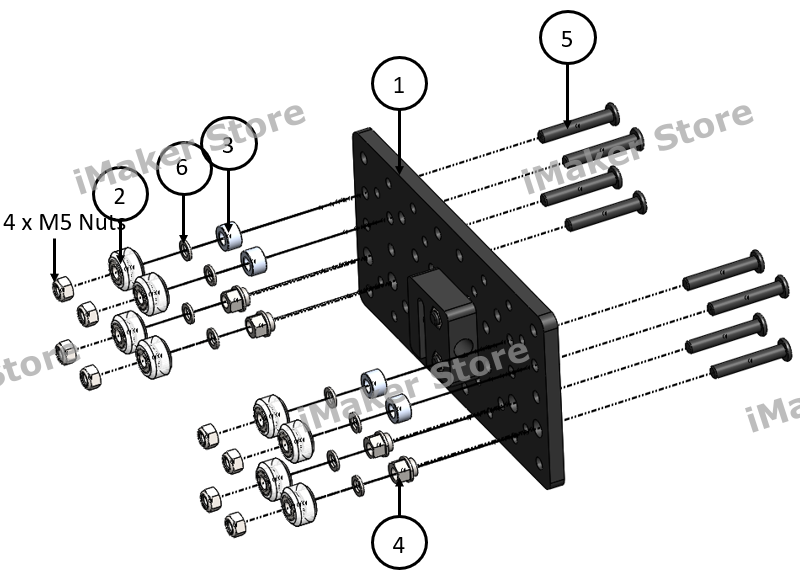
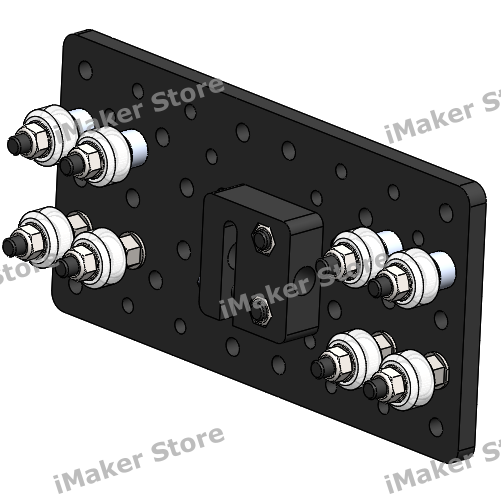
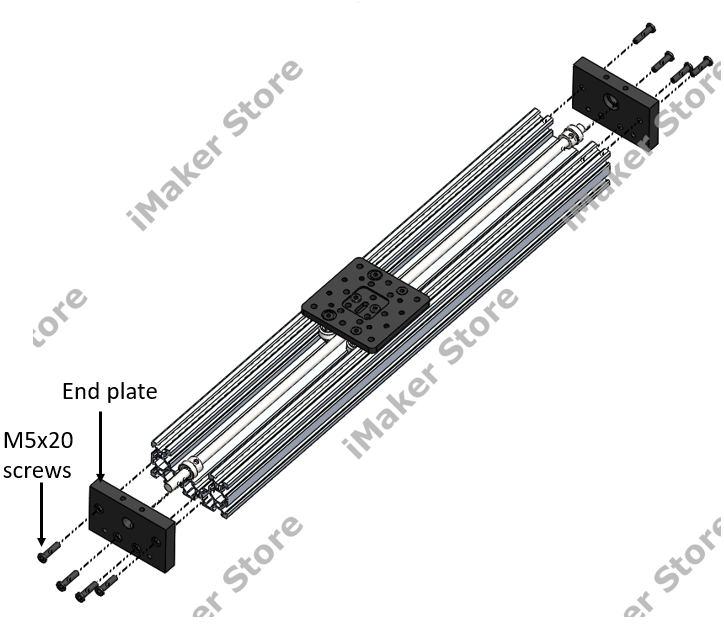
Step 5: C-beam End Plate Assembly
- Attach the end plates to C-beam using M5x20 screws.
- Check the leadscrew's rotation direction and the gantry cart's movement, and select the appropriate side to attach the motor to.
- In the next step, ensure that the lead screw at the motor end is protruding for fixing the coupling. Take a look at the pictures below.
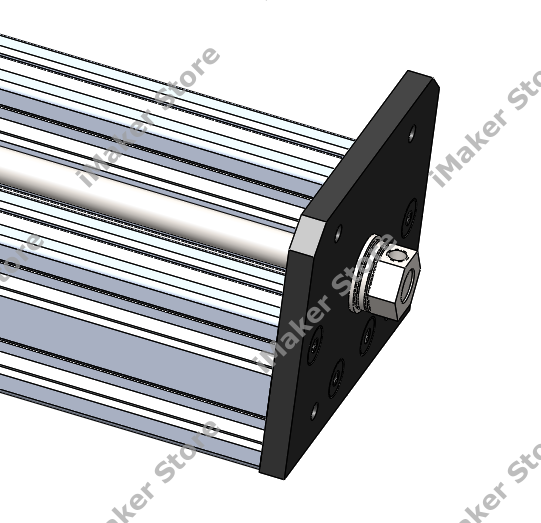
- Tighten the lock collar screw at both ends of the leadscrew to lock the leadscrew's position.
| Note: Only applicable to C-beam actuators above 1000mm in length. For above 1000mm length C-beam actuators, a tension nut is attached to the ends of the C-beam actuator, as shown in the image. This nut helps reduce Lead Screw ‘whip’, which can occur in Lead Screws that are longer than 1000mm. Installing the nut onto a Lead Screw helps ensure your machine runs smoothly at higher feed rates. Pairing 2 Lead Screw Tensioning Nuts with 2 Thrust Bearings, one at each end of your axis, will help hold tension on the Lead Screw. |
  |
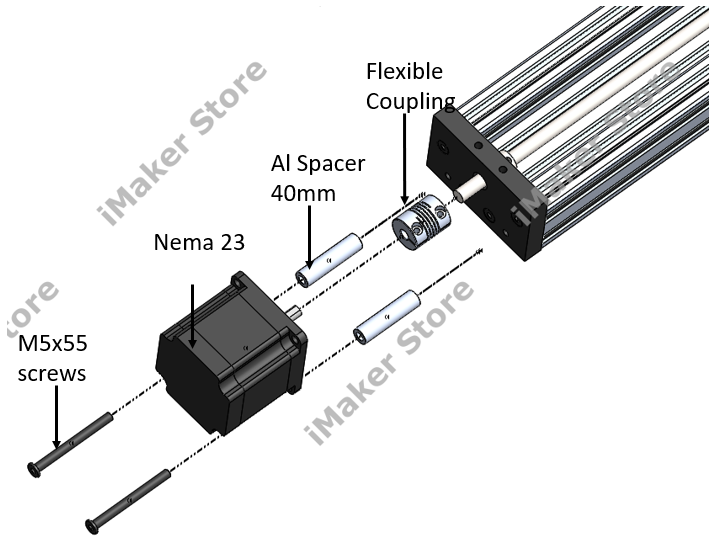
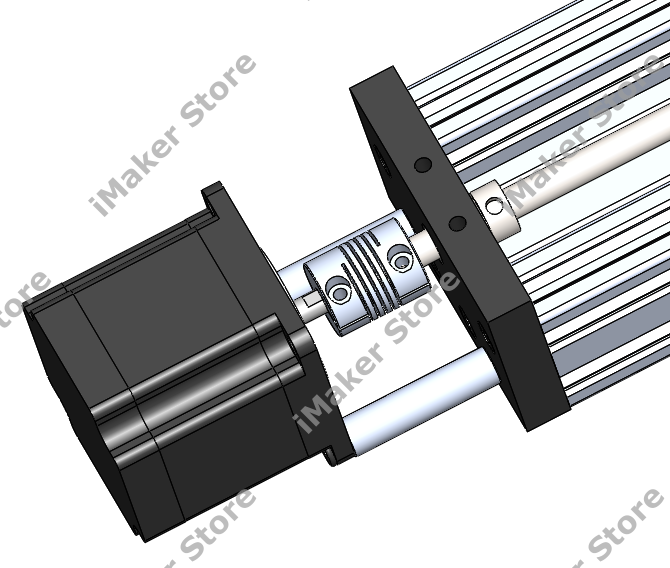
Step 6: Motor Assembly
- As you can see in the image, the Nema 23 motor should be attached to the C-beam.
- Make sure to tighten the screws of the coupling for uninterrupted rotation. These steps are crucial to keep in mind.
Step 7: Complete the assembly
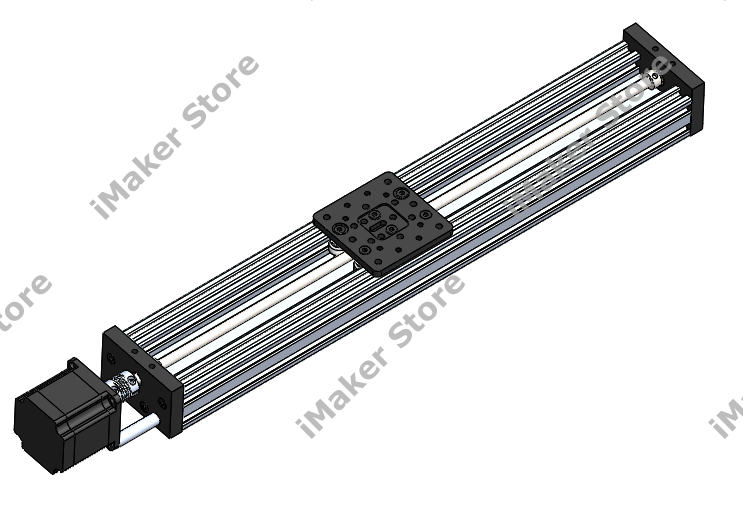
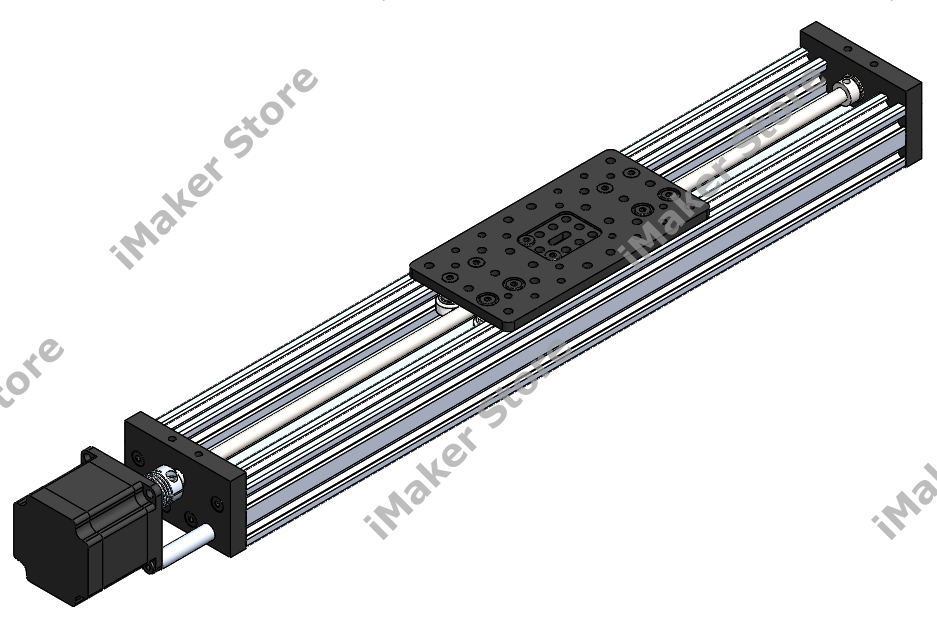
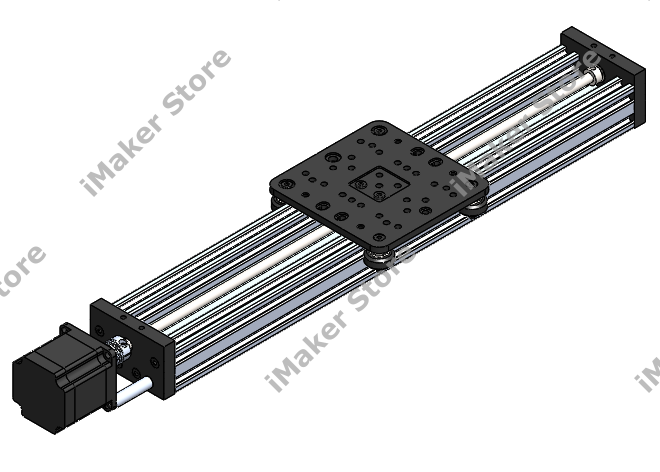
- C-Beam Actuator Kit-XL Gantry with Double Plate